
It’s important to know how long it is to tile a bathroom before you can completely transform the look and feel of the space.
This article provides a realistic overview of the time investment so you can plan accordingly.
How Long to Tile a Bathroom?
Tiling a small bathroom usually takes 2-3 days for a professional tiler or 3-5 days for a DIYer doing their first tile job.
The time depends on the bathroom size, tile complexity, layout planning, and your experience level.
Prepare for the project to take longer than expected.
Key Points
- Professionals can tile a bathroom in 2-3 days, DIYers need 3-5 days.
- Allow for 1-2 days of prep work like layout planning and surface preparation.
- Factor in tile drying time and grouting which can add a day.
Our Opinion
Based on industry standards, I think most DIYers should budget 4-5 full days to tile a standard bathroom.
The prep work and learning curve for beginners means it will likely take longer than a professional’s 2-3 day time frame.
Patience is key, as is leaving ample time for tasks like layout, spacers, grouting, and allowing materials to dry properly.
Rushing the job can lead to mistakes.
Measure and Prepare the Bathroom
The first step is crucial for a smooth tiling process. You’ll want to:
- Remove existing flooring and wall coverings – Allow up to a full day for this messy prep work.
- Deep clean the surfaces – Invest 1-2 hours to get rid of any soap scum, mildew, or grime.
- Measure and mark the layout – Spend 2-3 hours mapping out your tile plan and making any necessary cuts before installation.
- Gather supplies – Set aside 2-3 hours to buy speciality grout, backer board, trowels, and other tiling tools.
Rushing through these prep steps often leads to mistakes down the road, so be sure to dedicate enough time. The upfront effort will pay off later.
Overall, you’ll want to budget at least one full day for the demolition, cleaning, planning, and shopping phases. This will provide a solid foundation before the tile installation begins.
Remove Existing Flooring and Wall Tiles
Tearing out old tile and flooring can be tedious. To make efficient progress:
- Use a pry bar and hammer to carefully pry up tiles and adhesive.
- For resilient vinyl, an oscillating multi-tool simplifies cutting and removal.
- Expect popping tiles to be noisy. Wear eye and ear protection.
- Dispose of debris as you go to avoid clutter.
Removing existing materials provides a blank canvas for new tiles. Allot 2-3 days for this demolition phase, more for larger bathrooms. Work carefully to avoid damaging the underlying surfaces.
Prepare and Level the Floor
Prepping the floor is crucial for a long-lasting tile installation. Be sure to:
- Fill any cracks or holes with a patching compound.
- Grind down high spots for a flat surface.
- Apply self-levelling compound if needed to fix major unevenness.
- Allow proper drying/curing times for compounds per manufacturer instructions.
A perfectly flat and smooth subsurface prevents cracked or loose tiles down the road. Don’t rush this step – a day spent levelling now saves headaches later. Use a long straightedge to check for flatness. The floor shouldn’t have any deviations over 1/8 inch.
Once satisfied with the flatness, give the floor a final vacuum and wipe down before you begin setting the tile. Patience and diligence now will lead to a successful installation.
Lay the Tiles on the Floor
With the floor prepped, it’s time to start setting those tiles. This part takes time and care:
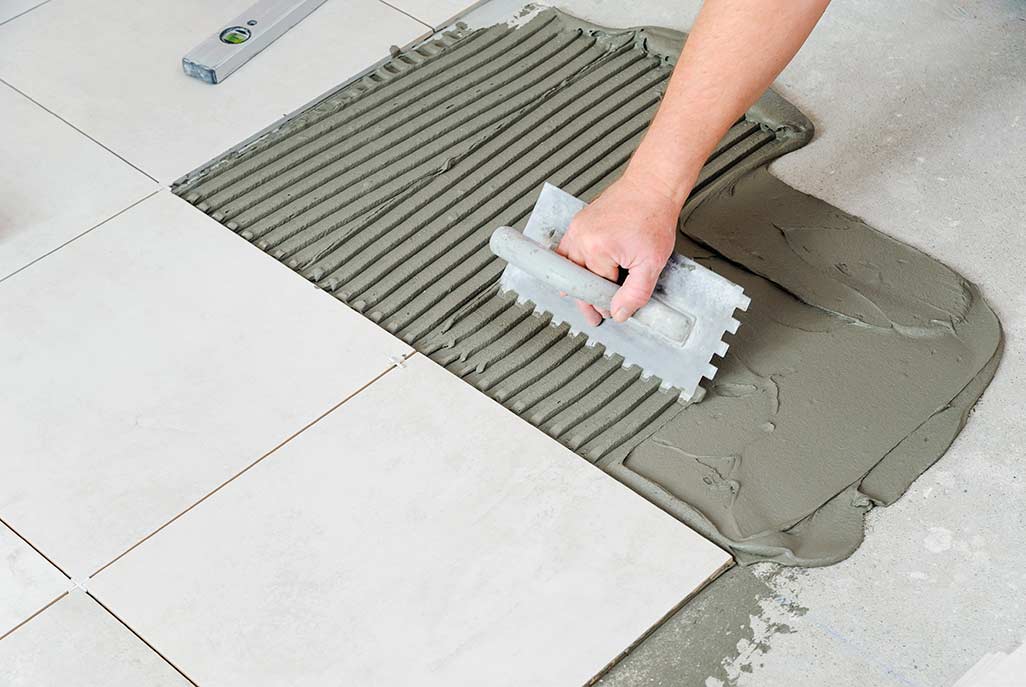
- Use a notched trowel to spread a thin layer of thin-set mortar, following the product’s instructions.
- Lay the tiles in the thin set, using spacers to maintain even grout lines.
- Make sure tiles are fully embedded in the thin set with no gaps underneath.
- Check tiles periodically for proper coverage and alignment.
- Allow thin-set to cure per manufacturer directions before grouting.
Don’t rush through laying the tiles. Methodically work row by row or section by section. Allow time for the thin-set beginners to set up before continuing. Carefully inspect each tile to ensure proper installation. Taking your time now prevents problems after grouting. Patience pays off with a flawless tile floor.
Tile the Walls
Tiling the walls comes after the floor but requires the same care and precision. Follow these tips when installing wall tiles:
- Start with the bottom row. Use spacers and levels to keep tiles straight.
- Apply thinset with the proper trowel angle. Heed manufacturer’s instructions.
- Use tile levelling systems for large format tiles. This prevents lippage between tiles.
- Make sure tiles are fully embedded. No gaps or air pockets should exist behind the tiles.
- Take time setting each tile. Rushing leads to uneven tiles and grout lines.
Tiling walls takes practice. Work methodically and inspect as you go. Allow thinset to cure before grouting. Your patience will pay off with professional-looking results. The final step is grouting, which pulls the whole project together.
FAQ
How long does it take to tile a bathroom?
It can take 1-2 days for a professional to tile a small bathroom, but 3-5 days for a DIYer to do their first tile job.
How many m2 should a tiler do in a day?
An experienced tiler can lay around 20-30 m2 in a day. Beginners will lay around 10-15 m2 per day.
How long should a tile job take?
A typical bathroom tiling job takes 2-3 days for a professional, and 3-5 days for a beginner DIYer. Larger or more complex jobs may take 5+ days.
How long does it take to tile the bathroom wall?
Tiling a bathroom wall typically takes 1-2 days for a professional, and 2-3 days for a DIYer. The time depends on the wall size and tile complexity.
Conclusion
Tiling a bathroom can take anywhere from 1-5 days depending on your skill level and the size of the bathroom. Professionals can often complete a bathroom tile job in 2-3 days, while beginner DIYers should expect it to take closer to 4-5 days. It’s important to properly prep the surfaces, lay out the tiles, mix grout, and allow time for drying and cleanup. With some patience and preparation, tiling your bathroom over a weekend is certainly feasible.